-
-
Print the following:
-
1x TopLeftNode.stl
-
1x TopRightNode.stl
-
3x TopCenterNode.stl
-
20x RegularNode.stl
-
I used carbon fiber PLA. Nail that first layer - it's what people will see.
-
The Top nodes must be printed with supports everywhere. The Regular nodes do not need supports.
-
-
-
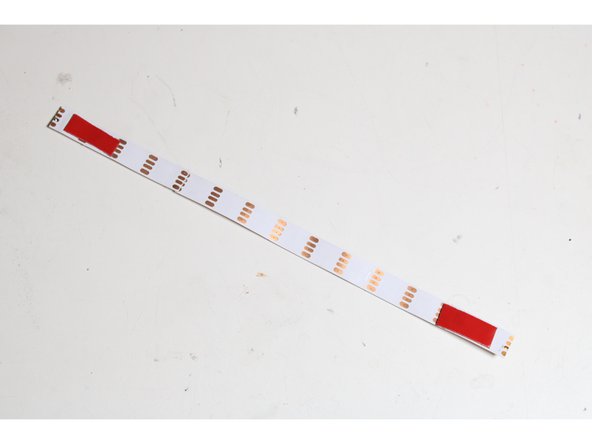
Cut 40 segments of LED strips, 14 LED's long.
-
Don't cut off too much of the pads on the ends! We need to solder to it!
-
Cut 40 segments of aluminum extrusion, 25cm each. Deburr the ends so they don't cut into the strips!
-
Cut 40 segments of diffuser plastic, 23cm each.
-
The diffusers should be shorter than the aluminum, or they'll be difficult to snap onto the extrusion after the system is assembled.
-
-
-
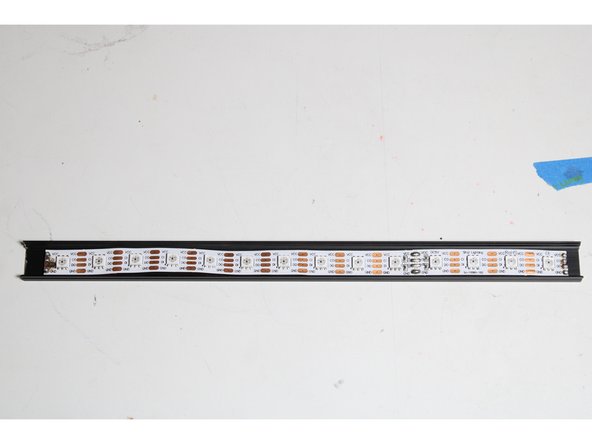
Use some heat-tolerant double-stick tape to mount a strip to the center of each aluminum segment.
-
Don't put tape too close to the ends! It'll burn when we solder the strips!
-
The tape may not be necessary if your strips are particularly wide. If the channel in the extrusion holds the strip securely on its own, no tape is needed.
-
-
-
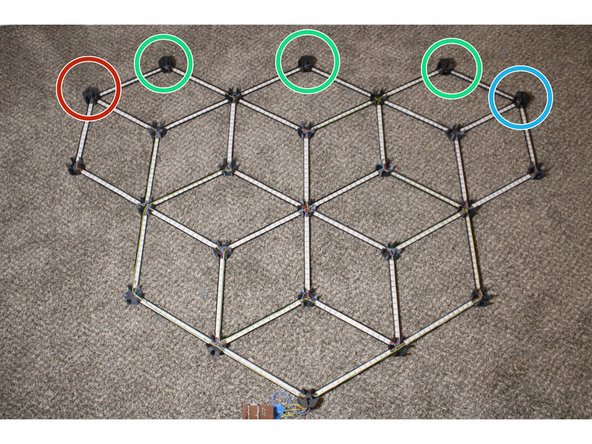
Assemble the network - but don't glue it yet! Remember that the node names are backwards, because this is sitting upside-down.
-
TopRightNode goes here.
-
TopCenterNodes go here
-
TopLeftNode goes here
-
All other nodes are RegularNodes.
-
Make sure the strips face the directions indicated. There should be arrows on the strips, but if there aren't, the pads named DI and CI are the start of the strips, and DO and CO are the end.
-
-
-
Before continuing, make absolutely sure that the strips and hubs are correctly oriented.
-
Double-check that the Top piece keyholes have the narrow bit facing up, and the circular bit facing down.
-
Seriously, be careful. This glue is permanent.
-
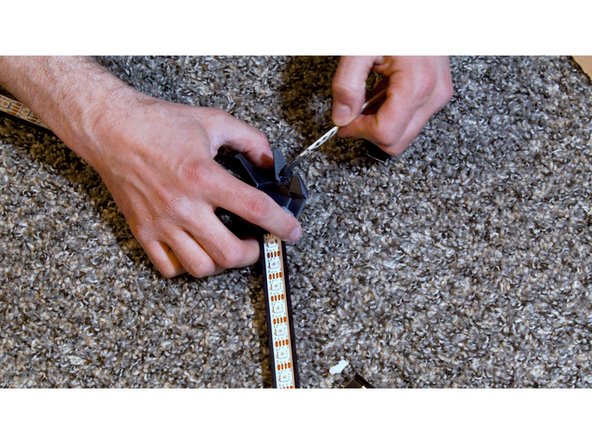
Mixing small batches at a time, epoxy the segments into the hubs. They should bottom out into their slots.
-
Ventilate the room with fresh air, and allow the epoxy to fully cure before continuing.
-
-
-
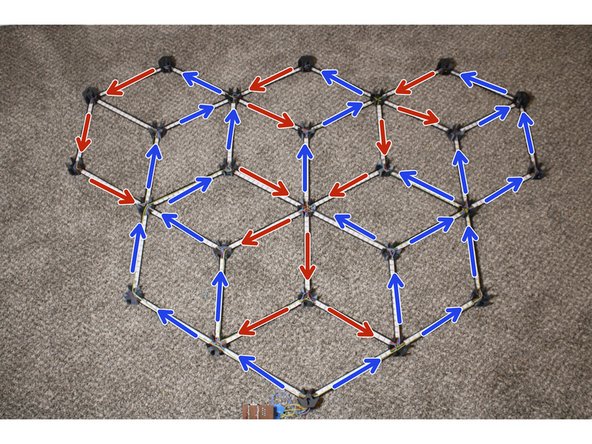
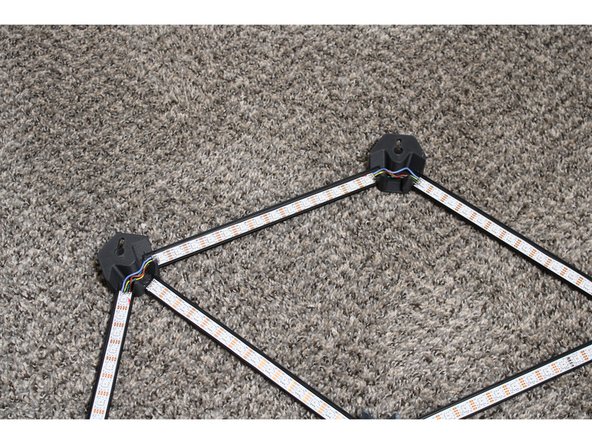
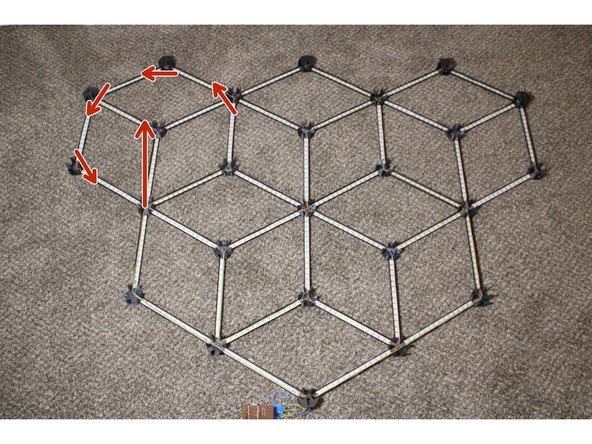
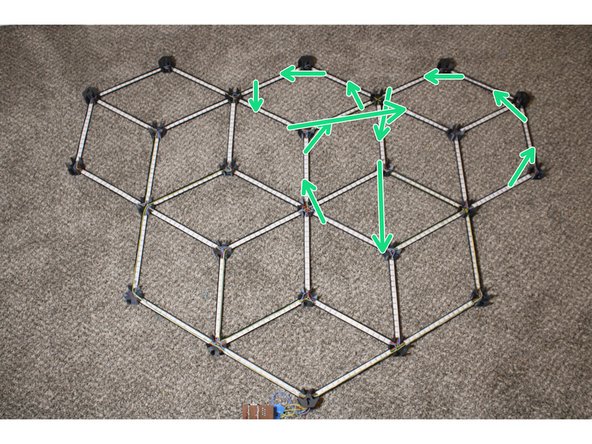
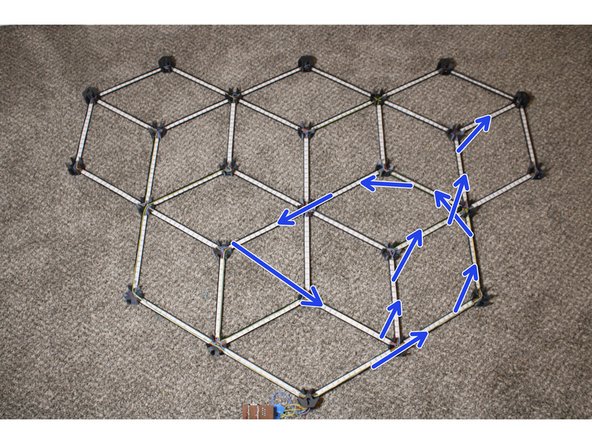
Solder the DO pin of each strip to the DI pin of the next strip. Repeat, soldering CO to CI.
-
I've indicated directions using arrows.
-
NeoPixels don't have CO/CI pins.
-
Due to the tutorial software's limits, the fourth strip sequence is shown in the following step.
-
-
-
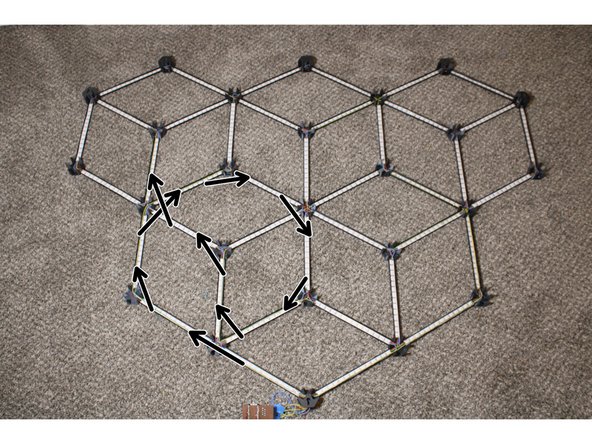
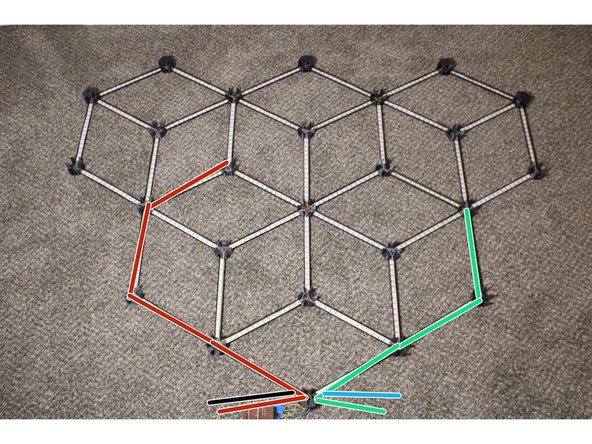
Solder up the last group of strips.
-
Some strips need to be connected with long wires run over other strips. Use hot glue to tack these out of the way so they don't block LED's or interfere with the diffusers.
-
Solder wires to the DI pins of the first strip in each of the four sets and route them out the bottom.
-


