
Difficulty
Easy
Steps
7
Time Required
00:10:00
- Warp Saya Assembly Guide 7 steps

Featured Guide
This guide has been found to be exceptionally cool by the site's staff.
Quiz
0
Introduction
Thanks for buying a Voidstar Combat Sports Warp Saya! Whether your platform is belt or MOLLE, or your Warp Saya holds one or two mags, or you use Talons or Katanas, this guide will show you how to build your mag holder.
-
-
Let's take inventory. Your Warp Saya includes:
-
Back plate. You received either the MOLLE back or the belt back.
-
Front plate and sidewall
-
Shock cord
-
Divider and second sidewall, if you selected a duplex Warp Saya
-
MOLLE retaining stick, if you selected that model. This isn't used during assembly.
-
You'll also need a thin, pointy object like a pin, needle, or pick. This isn't included.
-
-
-
Thread the shock cord through the back plate's top two holes.
-
Thread the sidewall onto both ends of the cord.
-
If you're building a duplex Warp Saya, also thread the divider and second sidewall onto the cord.
-
Insert each end of the cord into the top hole of the front plate.
-
Make sure the flat sides of the front and back plates face inwards towards the sidewalls.
-
The sidewalls have a single nub that clicks into your mag's mag release. Orient the sidewalls to fit your style.
-
-
-
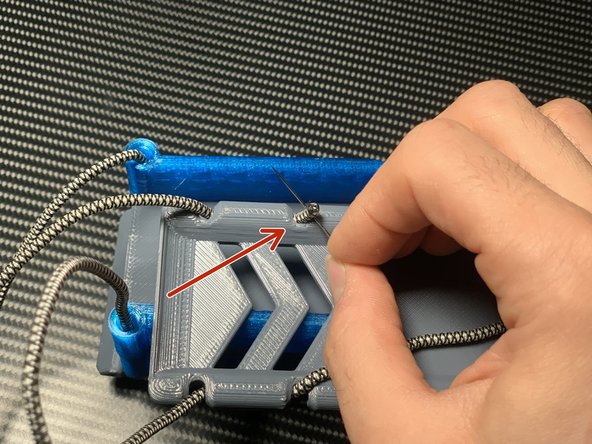
Pull the cord through the second set of holes on the front plate. You may need to use your pin.
-
Even the ends up.
-
Pull the cord to bring the pieces together. They should be snug but not tight.
-
-
-
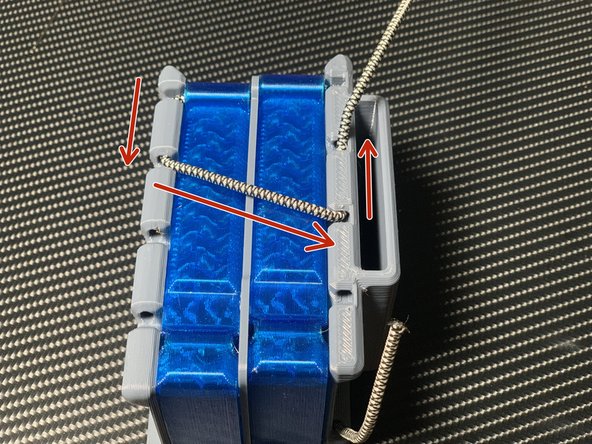
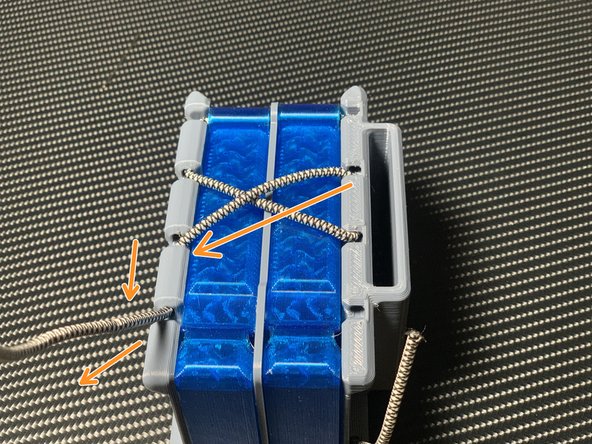
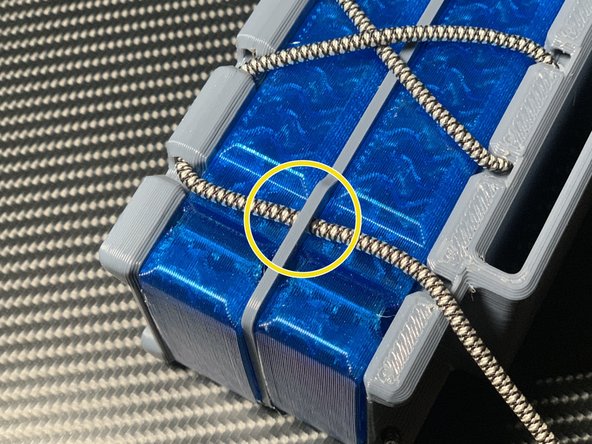
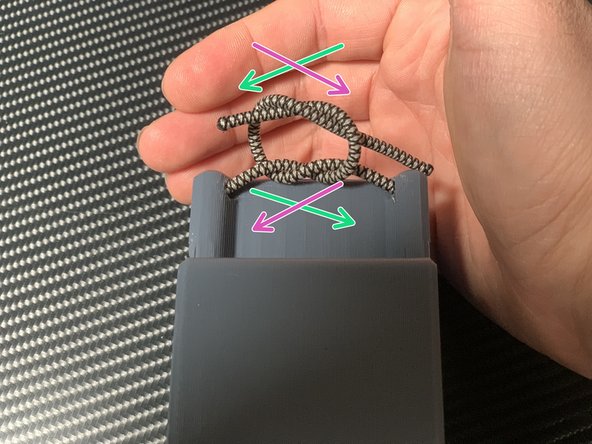
Now we'll thread the rest of the loops. You may need to use the pin to pull the cord around corners.
-
Pull one end of the cord diagonally across, thread upwards, and pull through the second hole from the top.
-
Then, pull diagonally to make an X, thread downwards, and pull through the lower hole. The X prevents the Warp Saya from flexing too much.
-
If you're building a duplex Warp Saya, thread the cord through the divider's lower hole.
-
Your Warp Saya's divider may have notches instead of holes. Don't worry, they work just as well.
-
Repeat for the other side.
-
-
-
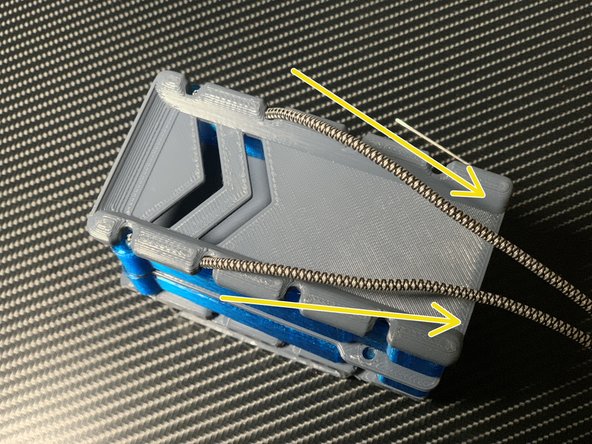
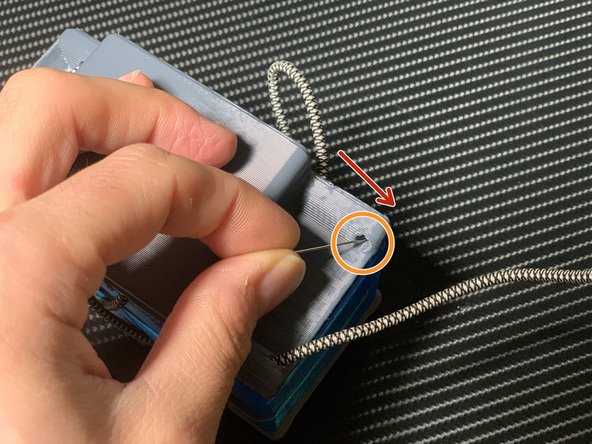
Time to finish threading the cord.
-
Thread the cord downwards.
-
Don't let the cord bottom out at the last hole. Leave a little wiggle room.
-
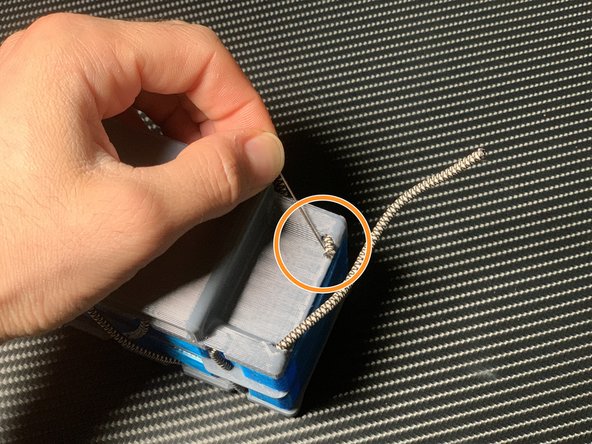
Use the pin to pull the cord out of the back plate's lower hole.
-
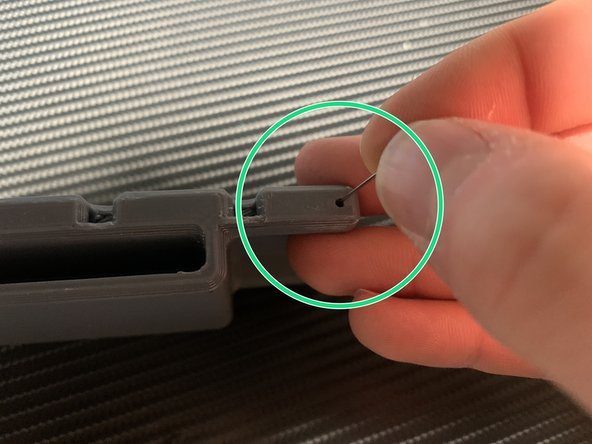
Your back plate may have tiny holes on the sides. You can use these to push the cord out, instead of having to fish it out.
-
-
-
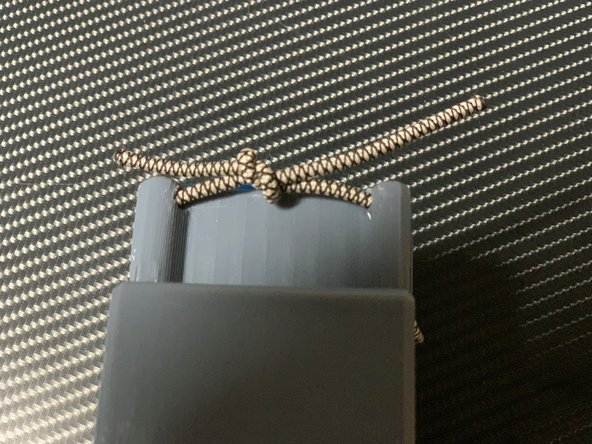
Time to finish the job. The Warp Saya is held together by a square knot.
-
Tie a single overhand knot.
-
Tie a second overhand knot.
-
Take care to cross the same side of the string over in both directions. The knot should look exactly like the picture.
-
Tying the second knot in the wrong direction will significantly weaken the Warp Saya.
-
Finally, pull the lower knot out to tighten the Warp Saya, and pull the ends tight to secure the cord. Gently pull each loop to spread out the tension.
-
The Warp Saya should be tight enough that it feels firm and solid, but loose enough that a mag releases easily.
-
-
-
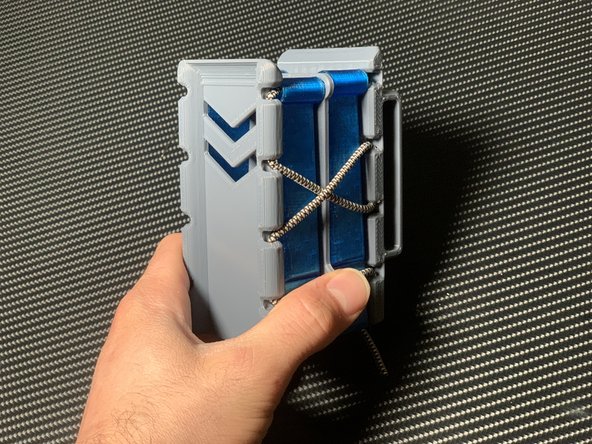
You're done! Attach the Warp Saya to your platform of choice and go to war!
-
The knot will tighten up over time, but you can untie it by using the pin to loosen the outer knot.
-
You can convert a duplex Warp Saya to a single, or turn the sidewalls around. You can even mix and match part colors! Experiment to find your perfect configuration.
-


Thanks for buying, and building, a Voidstar Combat Sports Warp Saya! Nerf on!
Thanks for buying, and building, a Voidstar Combat Sports Warp Saya! Nerf on!